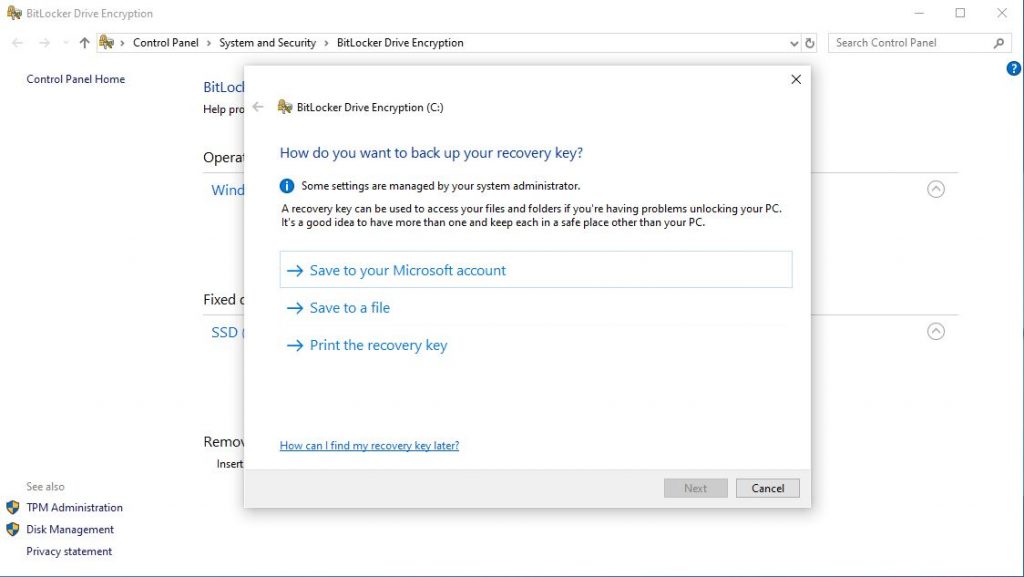
If your computer doesn’t come with TPM, you may be able to install a module. Check your manual to see if it supports an add-on. All the chips are pretty standard, but some motherboards use slightly different pins, so get one that is compatible with your board. I have an MSI motherboard, so I got an MSI TPM chip. Mine only cost about 20 dollars on amazon.com
Parts Used:
- MSI 914-4136-105 TPM 2.0 Module Infineon Chip SLB 9665 TT 2.0
- MSI Z170A Gaming Pro Carbon Motherboard
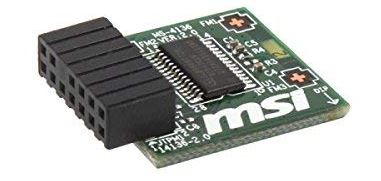
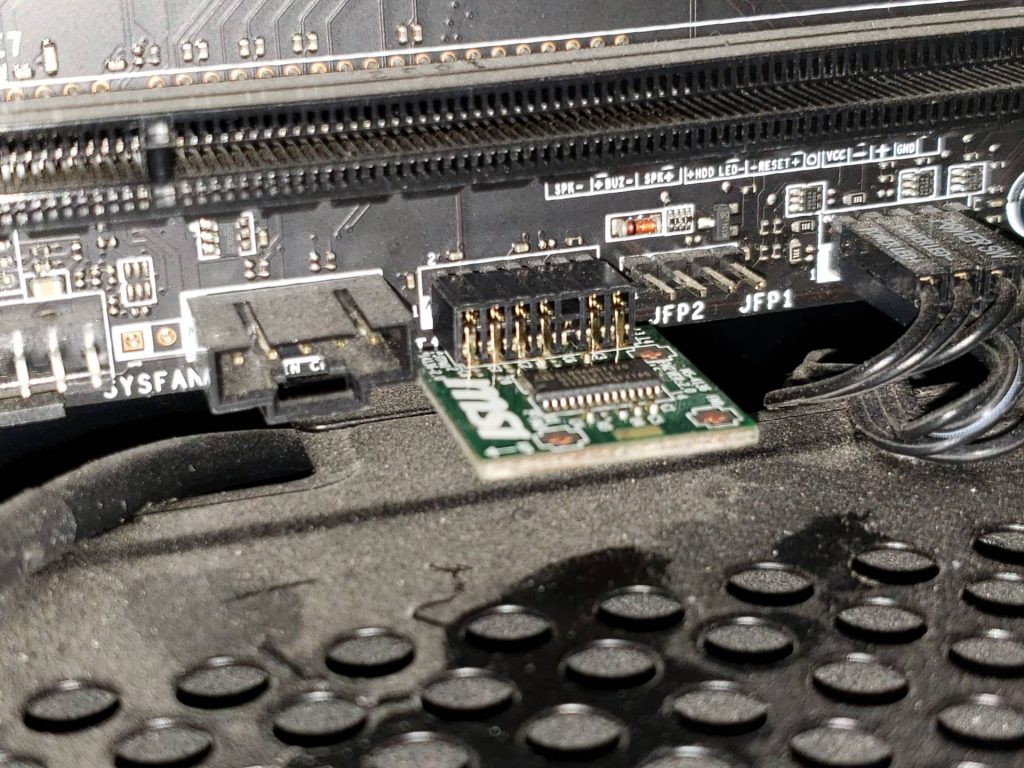
Once you get it, turn off your computer and slide the TPM module into the slot on your motherboard.
Don’t forget to turn on TPM in your BIOS/UEFI.
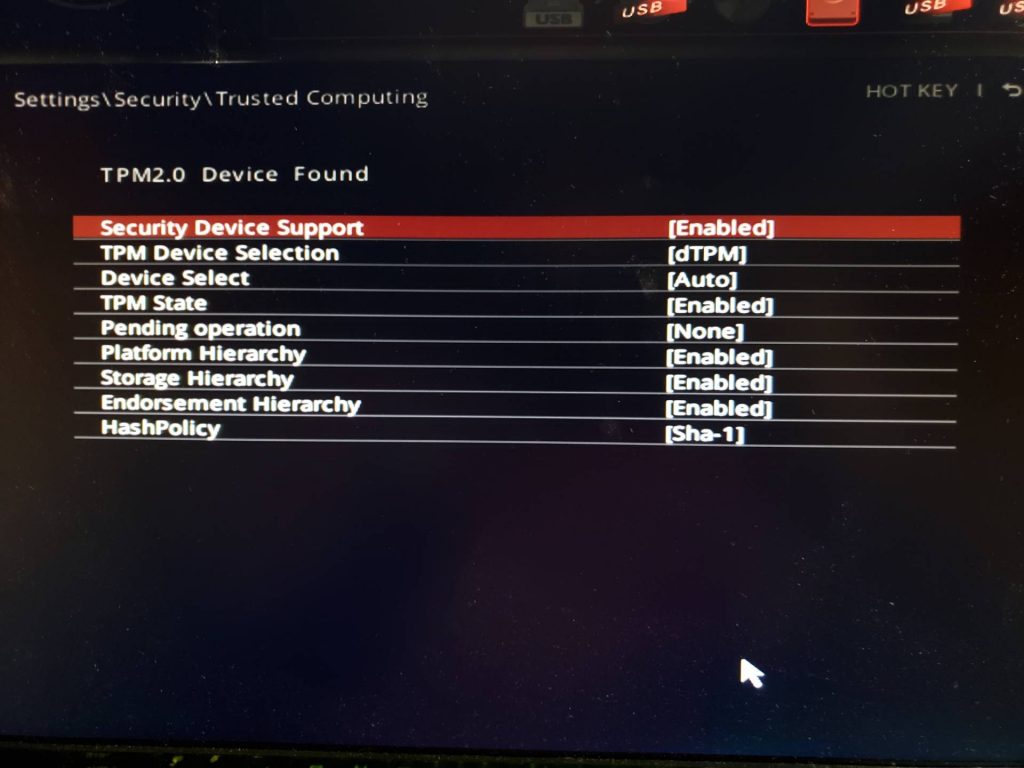
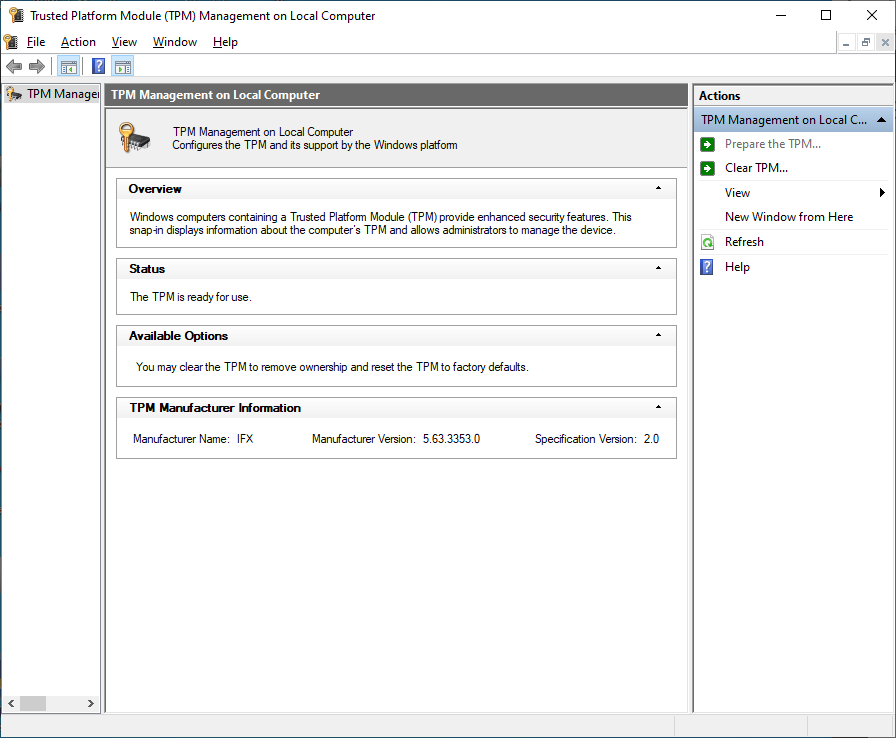
If the TPM has been used by another install, just clear it and take ownership (TPM.MSC). Unless you backed up your recovery keys, you will lose access to your encrypted data. BE CAREFUL WHEN CLEARING THE TPM! For the most part, Windows will take ownership and handle it. For me out of the box, it just worked. I didn’t have to do anything.
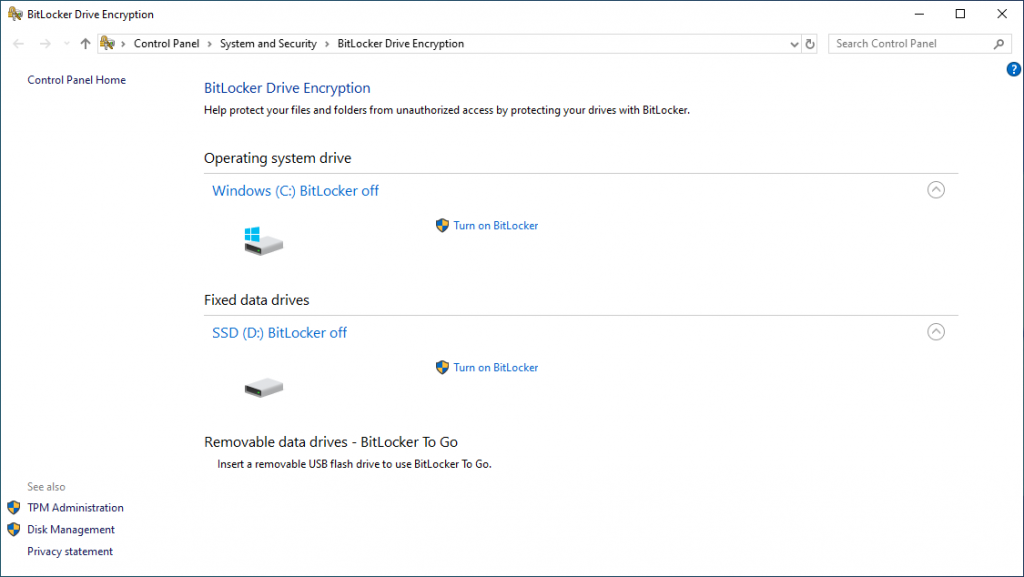
Finally, this is where you can start working with BitLocker. Head off to the control panel and turn it on.
Save the recovery key to a flash drive. This will just be a text file with your encryption key. Print this out and store it in a safe place. Don’t EVER lose this key! This key is what’s actually used to encrypt the data. It should be a long string of letters and numbers.
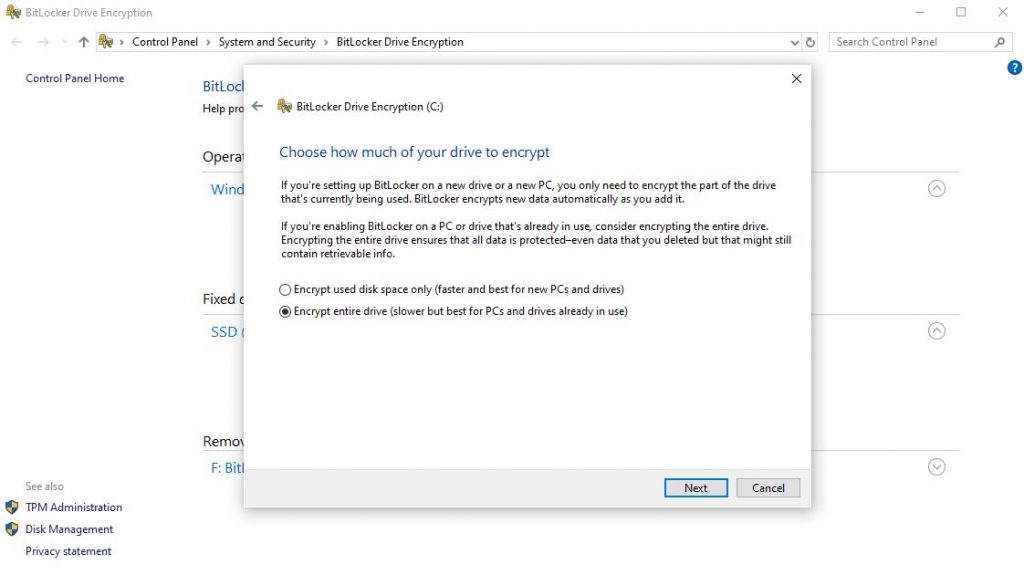
If this is a new computer with nothing on it, then just encrypt used disk space. If this drive has been in use for a while with data, encrypt the entire drive.
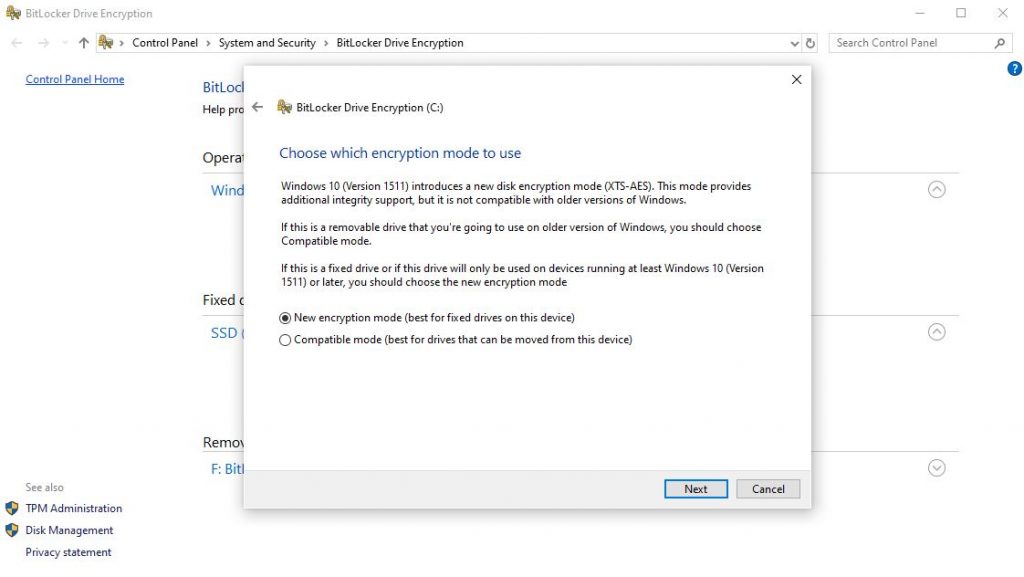
I would always use the best encryption mode. If you are encrypting a removable drive that will be used on other PCs, then use compatible mode. I’m not going to be removing this drive from my PC since this is the C:\ drive, so I’m just going to use the better encryption mode.
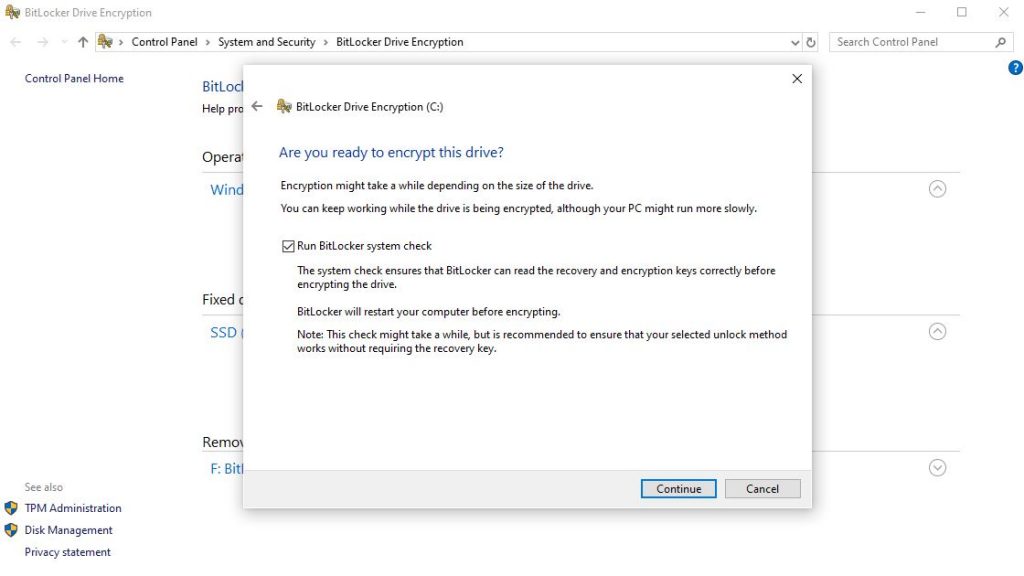
I guess let it run the check. It can’t hurt.
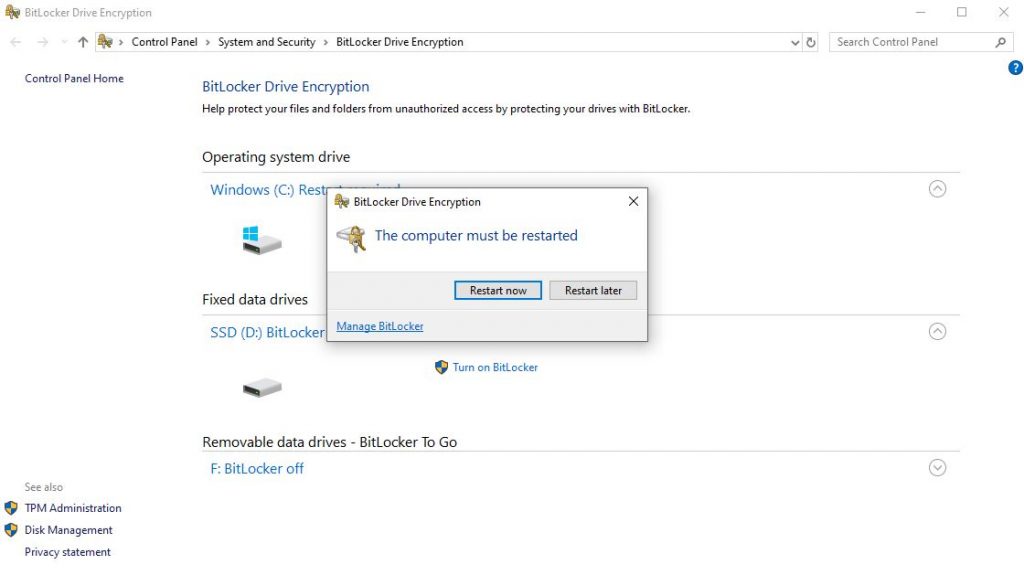
The final step is to restart your computer. Once it restarts the encryption will start in the background. You can still use your computer. This will take a while.
After this is all done, the encryption should be seamless. For the most part, nothing changes for you. Your computer will boot as normal. The TPM chip will check to see if nothing has changed hardware-wise and will pass the encryption key to the operating system during boot. The only way to get access to the data is to somehow guess the Windows password at login or somehow monitor the data flow between the TPM chip and the motherboard. This will keep your average thief at bay.
If you really want to be secure, I would add PIN authentication to BitLocker. This protects the BitLocker key stored on the TPM chip. With this enabled, Windows will boot to this pre-boot environment. It will ask for the PIN and pass this to your TPM chip. The TPM will check against the stored PIN and if it matches, it will pass the encryption key to the operating system to unlock the drive. If you type the wrong PIN too many times, the TPM chip will lockup. It’s done. Toast. Adios. The only way you’re getting back in is to type in the long recovery key you saved during setup. This is why it’s important to save that recovery key at the beginning of this tutorial. Once you get back into Windows, you’ll have to clear the TPM chip and take ownership, set a new PIN, and boom. You’re back in business.
The TPM chip is a secure black box that can store encryption keys and run crypto and hashing algorithms. The hardware is designed so that you can’t extract the keys by splitting the chip open or hacking it software-wise. Your friendly neighborhood NSA agents will probably resort to using a wrench instead of hacking it.


